
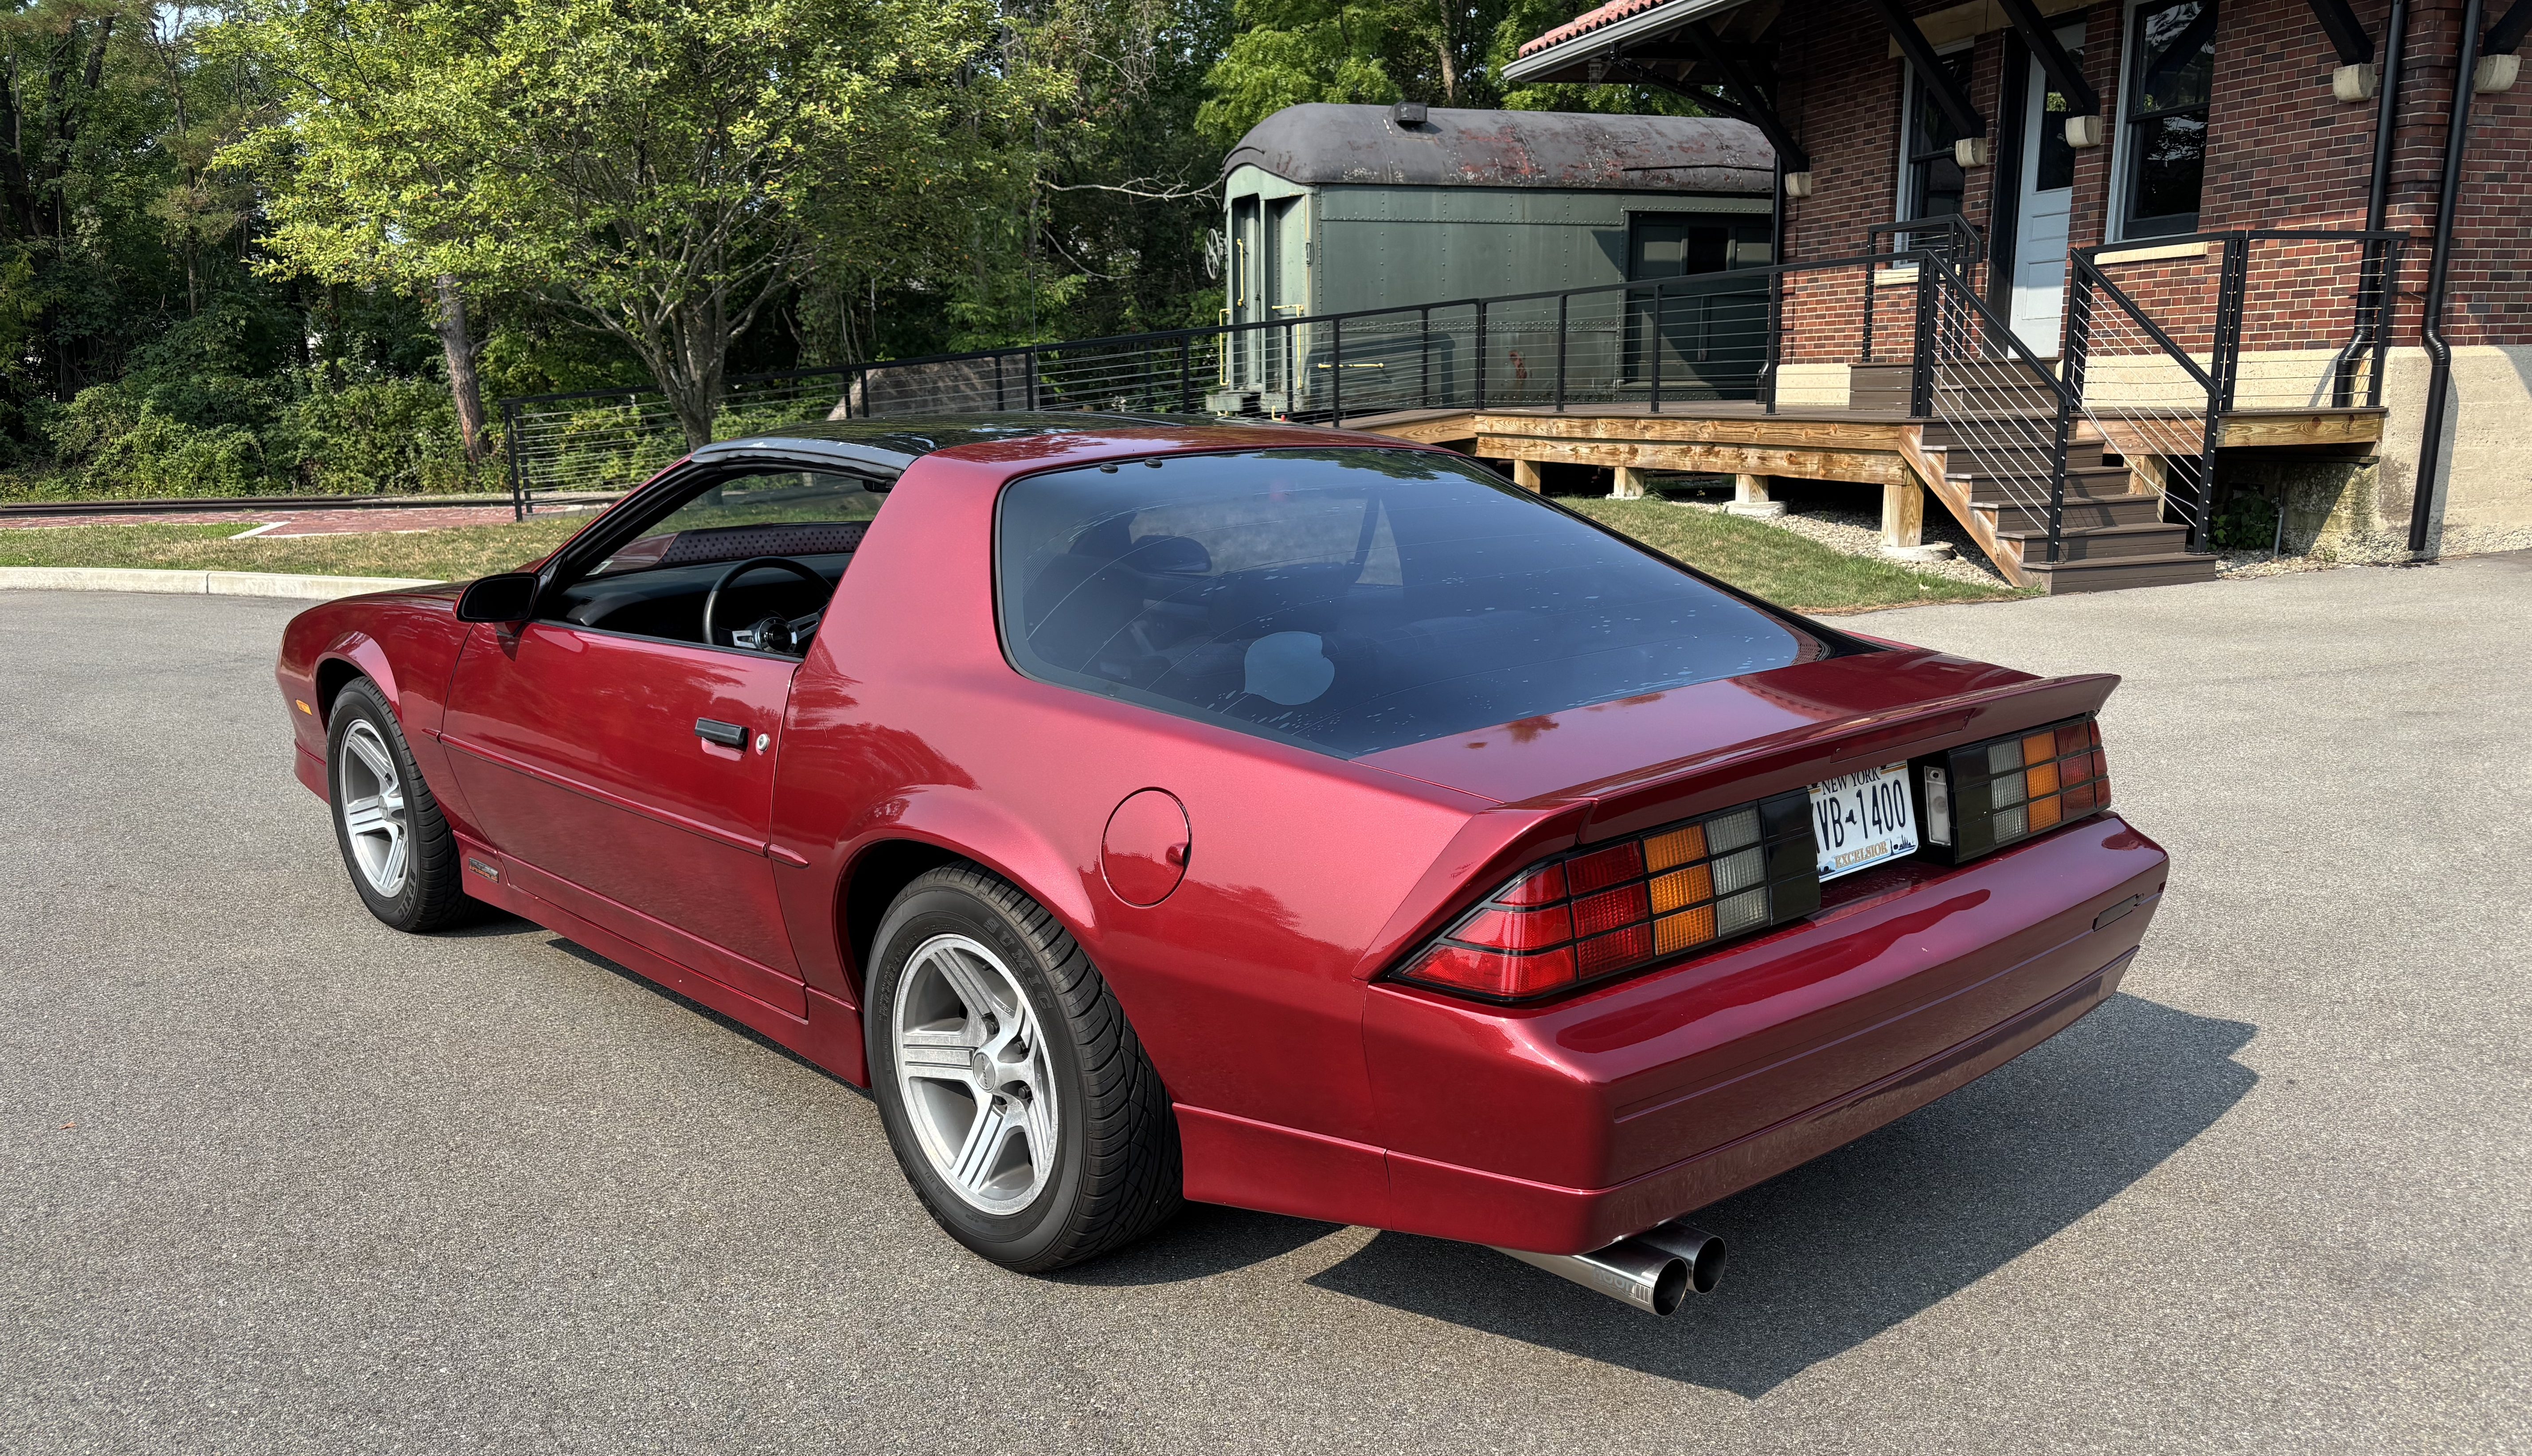
Finished Camaro with AR5 Transmission and LS1
Abstract
The purpose of this write up is to shed light on the AR5 as a viable options for not only all LS applications but specifically in the third generation Camaro/Firebird. I swapped my 1989 Chevrolet Camaro Iroc-z with a 5.3 liter LS1 truck motor over the weekend and almost instantly blew up my 700R4 transmission. This point seemed like a good time to swap the car to manual, but I was overwhelmed when I looked at the price of swapping T56 or TKX transmissions into the car. As a college student it was tough to even come up with enough money to LS swap it in the first place and then I was stuck with a LS swapped, transmission-less Camaro. This is where my hunt for a cheap manual transmission swap started. The AR5 came across my radar and I was sold instantly, and the rest is history.
Introduction
The Aisin AR5 is a 5-speed manual transmission developed by Aisin Seiki, a Japanese manufacturer known for producing durable and high-quality transmissions. The AR5 is part of the AX15 transmission family, sharing similarities with the Toyota R154 and Jeep’s AX15, making it a strong and adaptable gearbox. The AR5 is a fully synchronized 5-speed manual transmission with an aluminum case featuring a removable bellhousing. The Aisin AR5 was put in quite the range of different vehicles in the early 2000’s as seen below.
Donor Vehicle List
General Motors (GM)
- 2004–2012 Chevrolet Colorado (2.8L, 2.9L, 3.5L, 3.7L I4/I5 engines)
- 2004–2012 GMC Canyon (same engine options as Colorado)
- 2006–2008 Hummer H3 (3.5L and 3.7L I5 engines)
- 2007–2010 Pontiac Solstice (Base model, not GXP) (2.4L Ecotec I4)
- 2007–2010 Saturn Sky (Base model, not Redline) (2.4L Ecotec I4)
Isuzu
- 2006–2008 Isuzu i-280 / i-290 / i-350 / i-370 (badge-engineered versions of the Colorado/Canyon)
Toyota
- 2005–2015 Toyota Tacoma (4WD models) (2.7L I4 and 4.0L V6)
- 2007–2009 Toyota FJ Cruiser (4WD models) (4.0L V6)
- 2005–2011 Toyota Hilux (some models outside North America)
Different Versions
It is important to note that there are different versions of the AR5. These can be denoted as car, and truck (2wd and 4wd) transmissions. The features that remain the same between the three versions are the gear ratio, input shaft, output spline, and fluid. For these specifications see Figure 3. The differences between the three versions being in the bellhousing pattern, tail housing, and shifter location. See Figure 1 for the specific differences between each version.
| Feature | Truck (2WD) | Truck (4WD) | Car (RWD) |
| Bellhousing Pattern | GM Atlas I4/I5 | GM Atlas I4/I5 | GM Ecotec I4 |
| Output Shaft Length | Longer | Longer | Shorter |
| Tailhousing | Extended tailhousing | Compatible with transfer case | Standard tailhousing |
| Shifter Position | Forward-positioned | Forward-positioned | Rearward-positioned |
| Donor Vehicle | Chevy Colorado, GMC Canyon (2WD) | Chevy Colorado, GMC Canyon, Hummer H3 (4WD) | Pontiac Solstice, Saturn Sky (RWD) |
| GM Part Number | 19256450 | Varies by model | 19256654 |
Table 1: Comparison of AR5 Models
The table above shows the differences between each transmission. In any LS application the bellhousing pattern of the donor transmission does not matter because it must be converted to LS bolt pattern. The differences that are important to the swap of your choice are 2WD/4WD and then if your swap is going into a truck or car. For the 3rd generation F-body the Car transmissions are ideal as the shifter location aligns well with our stock shifter location.

Figure 1: AR5 Car Model
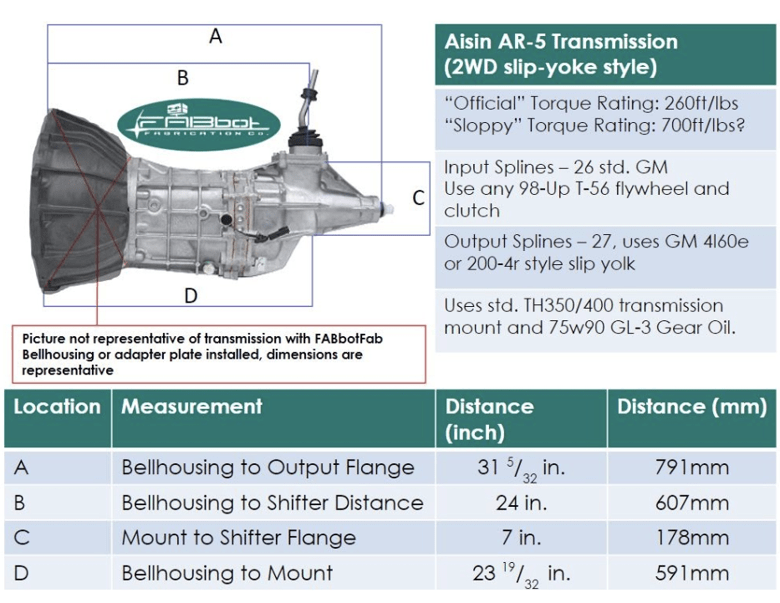
Figure 2: AR5 Truck Model
In figure 2 we see a 2WD truck transmission with some pertinent information. All of the measurements listed above are different to the 4WD version and the car transmissions. Some of the advantages of using an AR5 are seen above with the standard input/output splines as well as a standard GM mount. These input/output splines match the LS platform, and the output shaft matches the stock 3rd Gen driveshaft spline.
Power Rating
It is important to mention the power ratings for these transmissions. The AR5 is rated at 300 ft/lb’s of torque from GM. Through word of mouth and forum posts there are testimonials stating the AR5 transmissions are much stouter than this. It seems plausible that they are more durable than GM gave them credit for as they are commonly used in drifting applications. One source that states this is AR5/4200 Info which is referenced in Figure 3.
Why Choose the AR5
Everyone is familiar with Tremec’s TKX and T56 transmissions at this point as they are the gold standard of LS swap transmissions. The AR5 is a much lesser-known transmission as it was not put in any sports cars worth noting, and they do not directly bolt onto any LS or SBC platforms. We will discuss how we can adapt the transmissions to work in our applications later. The main driving factor for the AR5 emerging as a new option is that T56 and TKX’s are getting quite expensive.
Cost
A T56 Magnum transmission with no bellhousing or slave cylinder can be found for $3545 (). At this price a full swap can be upwards of $10,000 all said and done. The biggest advantage of AR5’s is their price on the secondhand market. The average price of an AR5 in the Northeast is $300 pulled from a junkyard. To convert the AR5 to bolt up to an AR5 will cost roughly $1500 which will have the transmission ready to install in the car. At this price it’s $1000 cheaper than the T56 without buying a bellhousing, clutch, flywheel, or slave cylinder yet. These are massive cost savings and its important to note a TKX could be less expensive than its 6-speed counterpart but it will still be substantially more expensive than a AR5 swap.
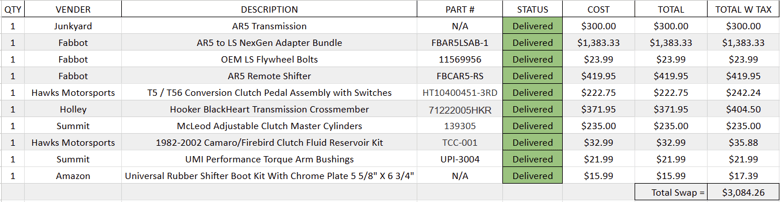
Table 2: Itemized Order List with Cost [1]
In the table above we can see that the total cost of all purchased components sums to a total of $3066.87 at the time of writing (assuming NY state tax). It is important to note that there are countless hours of installation and fab work that needs to be done in order to make this swap. This cost is much more manageable than that of the T56 or TKX transmission which can cost the same price for just a transmission.
Accessibility
The AR5 came in a number of different GM vehicles, and it is not too difficult to come by in a junkyard. In a 25-mile radius I found two transmissions in one day of searching for them. This is rare when looking for used T56/TKX transmissions. The other option of T5’s are quite plentiful but struggle when your motor starts to make large amounts of torque.
Gear Ratios
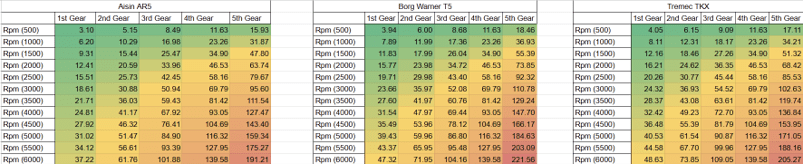
Table 3: Comparison of Speed based on Gear Selection and RPM
This comparison shows the speed (mph) at various rpm and gearing between the AR5, T5, and TKX transmissions. A couple of considerations to make for these calculations are that we assumed the same rear end gearing (3.27), tire diameter (25.56”) and that our LS rev limiter is set at 6000 rpm. The largest difference between the AR5 and the T5/TKX is the ratio of first gear. The Ar5 has a much taller ratio which is due to its application is trucks. This means first gear will not top out as fast as most transmissions and will produce much more torque (better burnouts…). If any of these parameters don’t match your car there is a copy of the excel sheet, I used in the works cited that you can reference/change in your own calculations [2].
Mating the AR5 to Engine/Car
Adapting to LS
A stock AR5 will not bolt up to an LS for a multitude of reasons, bellhousing pattern, slave cylinder spacing… We can solve all of these problems in one fell swoop with the Fabbot AR5 to LS NextGen adapter kit (linked in works cited). This kit comes with a bell housing adapter that runs a 4L60 factory bellhousing, a T56 style slave cylinder/throw out bearing with the appropriate spacer for the correct engagement on the supplied clutch and flywheel package. There are various bits and pieces included that will allow you to bolt up your transmission in no time. I cannot say enough good things about their kit, and the customer service is excellent as well. I should note that you can also buy certain parts from Fabbot and source the rest from other vendors, such is outside the scope of this write up.
Transmission Crossmember
In order to mate the transmission to a 3rd gen F-body you will need to fabricate an adapter from the hooker-blackheart crossmember to the existing rubber mount on the transmission. I am currently developing a crossmember for this application.
Driveshaft
Addressing the driveshaft will vary from car to car depending on the stock transmission your car was equipped with. My 1989 Camaro Iroc-z came with a 700R4 automatic from the factory which according to my research came with a 47.125” long driveshaft. If you also have this spec driveshaft, then you should have no issues using it with your AR5 swap. It is important to test this by putting the suspension at full droop and full compression to see how much play there is from front to back of the car. If there is any question in your mind that the driveshaft doesn’t seem right, it’s important to take a measurement from the yokes and determine if you will need a custom driveshaft.
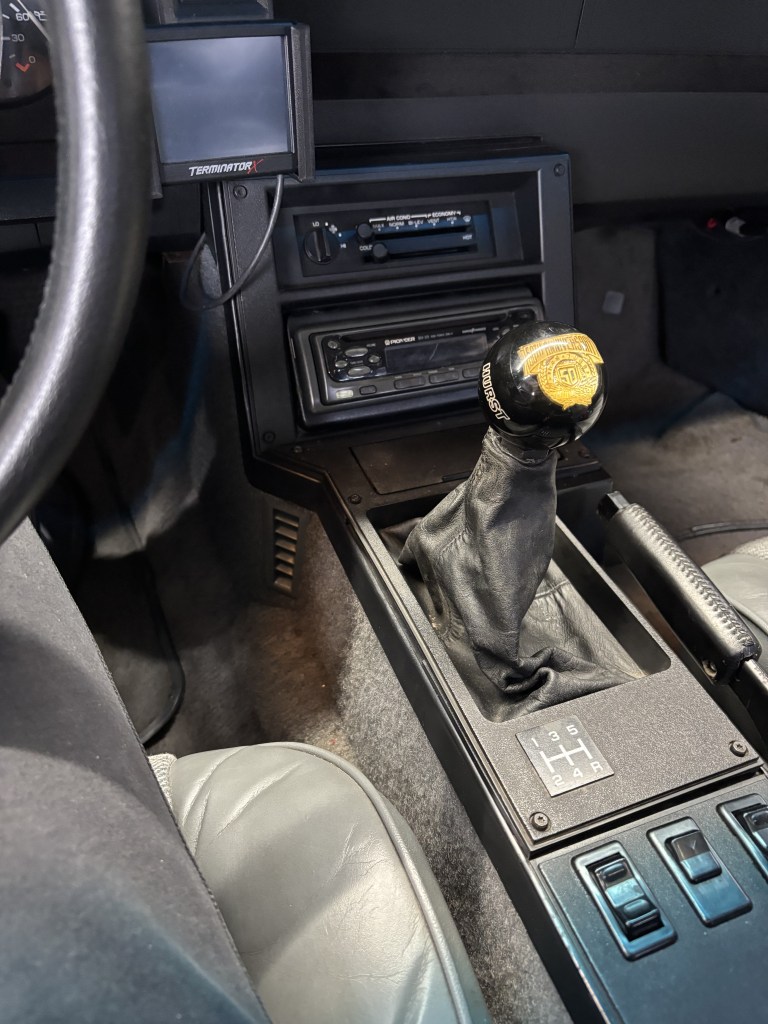
Shifter Hole
The shifter hole is another spot where you will have to use fabrication skills to make this work. I started with a general hole where my automated shifter was and slowly expanded it while fitting the transmission in the car
Shifter Location
The main issue with the shifter is where it will land relative to the stock location. Optimally we would be able to use a stock 3rd Gen center console leather shifter boot on our new transmission. If you have a car transmission it may be very close and you can modify your shifter to land in the center of the stock 3rd gen location. If you have a truck transmission the best option to move the shifter to the stock location is by buying Fabbot’s Remote Shifter. This moves the shifting location backwards 6” and also tightens the shift pattern substantially. Depending on your motor mounts and transmission crossmember the shifter may be shifted towards the passenger side. I fixed this by making a custom shift rod similar to what would be done with a car transmission.
Pedals/Hydraulics
The best option for pedals will be buying the hawks T56 manual conversion pedals (see references). They will provide all of the switches, connectors with leads and any needed hardware. There also are 4th gen used pedals out there that typically don’t include any connectors/leads, but will be much cheaper. Both of these pedals will bolt into a 3rd generation without any issues as the only difference between the two is the extended arm for the clutch master cylinder. There are many options for a clutch master cylinder but the one that I recommend the most is the mcleod adjustable clutch master (see references). There are some reports of a stock 3rd gen clutch master having the slip point very high on the pedals with the AR5 conversion. The Mcleod adjustable clutch master will allow you to move the starting point of the pedal in order to align it closer with the brake pedal. The last hydraulic piece needed is the clutch fluid reservoir which can be found easily, whether you get a stock reservoir or an aftermarket universal reservoir.
Wiring the Transmission
Brake Lights
Adapting the brake lights to the new pedals is quite simple as all of the switches and leads needed are provided (see below). With your new pedals you will receive a supplied switch with a blue connector and four gray leads. The two smallest gray leads are the ones we will need to use for the brake lights. As you disassemble the stock pedals you will find a similar blue connector that has two small wires that are the same gauge as the new wires. All we need to do is splice the two wires from the stock blue connector into the new connector using the smallest gauge wires. This can be accomplished by simply de-pining the new connector and inserted the stock wires into the new connector. The new switch also has provisions for cruise control kill switch.
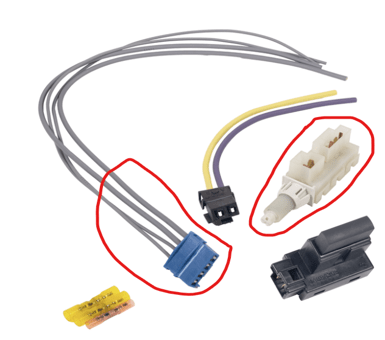
Figure 3: Brake Light Switch and Connector
Reverse Lights
The reverse light wiring is where wiring may differ from a T56 or T5. The reverse switch on the transmission is a simple switch. When in neutral, 1, 2, 3, 4, 5 the two leads on the transmission will not be connected. Once the transmission is put into reverse the leads will show continuity. This means that we need to run power to one lead and run the reverse lights ‘signal’ to the other. We can accomplish this by using the automatic shifter switch pictured below. The wires we will utilize are the middle two, which are green and purple in the picture below. I recommend turning key on and then jumping the two middle wires to confirm that the reverse light will turn on. Once you confirm this, splice these two wires to the leads on the transmission.
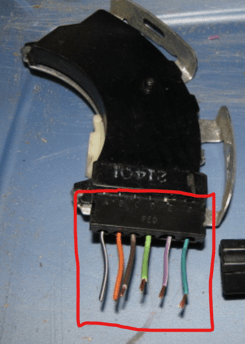
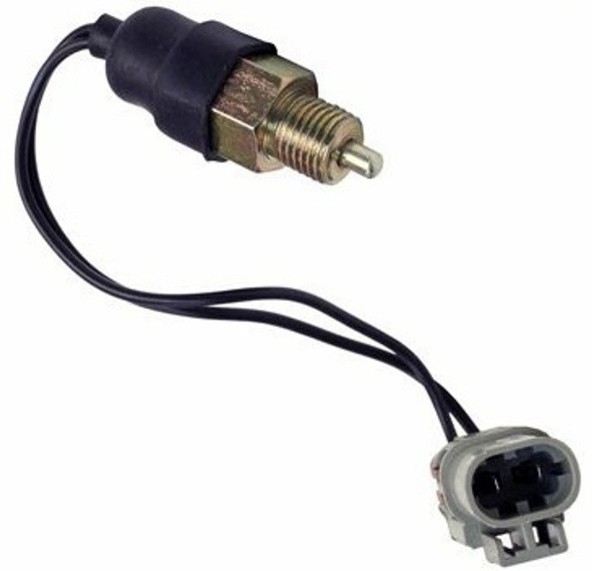
Figure 3 & 4 : Automatic Shifter Switch Connector & Reverse Gear Switch and Lead
Clutch Safety Switch
If you purchase the 4th generations style pedals from Hawks you will receive a sensor and connector with leads that will allow you to wire in a clutch safety switch into your car. This switch operates by connecting the two leads when the clutch is depressed fully. See the switch and connector below
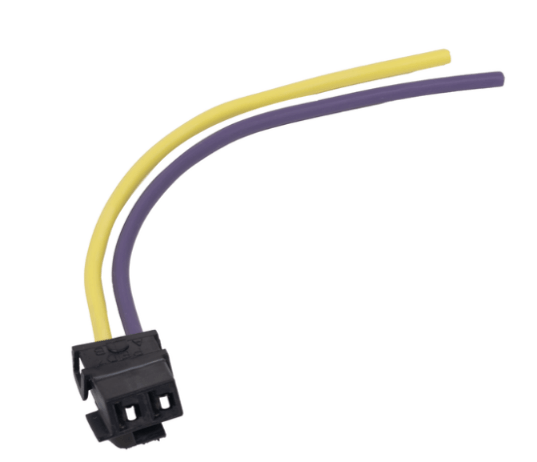
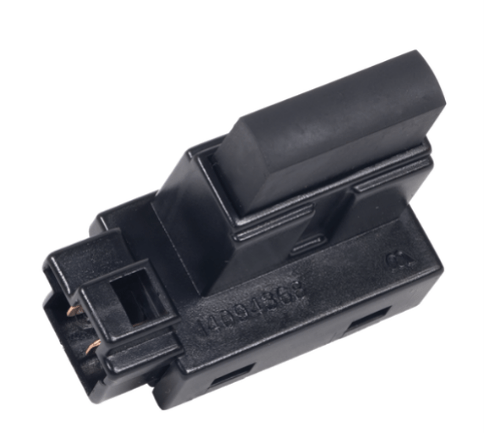
Figure 5 & 6: Clutch Safety Switch Lead & Clutch Safety Switch
It’s important to preface that I have a 1989 Camaro Iroc-z that had VATS and was automatic. If you have the same spec car it may be as simple as reading the instructions below, if not make sure to follow up with wiring diagrams to make sure you are wiring this properly. Most automatic 3rd gens will have a automatic shifter switch (see picture below).

Figure 3 : Automatic Shifter Switch Connector
Here you can see where most of the wiring modifications will take place. To focus on the clutch safety switch specifically we will be looking at the Green and Purple wires found on the right side of Figure 5. These wires will typically be a thicker gauge than the rest, making them easy to pick out. We will essentially be changing these wires from the automatics park/neutral safety switch to a clutch safety switch. It is as easy as wiring the green(green/white) to the yellow wire on the provided hawks connector and then purple to purple. Now upon key on and the clutch pushed in you will be allowed to crank the motor.
Speedometer
Option 1: Digital Dash
For most LS applications a digital dash is the easiest way to display all of your engine temperatures, rpm, and speed. Almost all digital dashes come equipped with GPS speedometers which will solve the issue of swapping an AR5 into a 3rd Gen.
Option 2: Ebay GPS speedometers
eBay has tons of affordable options for gps speedometers that are simply powered by a usb cable.
Option 3: Electronic to mechanical VSS converter
If keeping stock gauges is important to your build it might be worth considering the VSS converters. Speedhut has a large selection of these converters, some use gps for speed and others convert the VSS.
Option 4: Waze
No explanation needed.
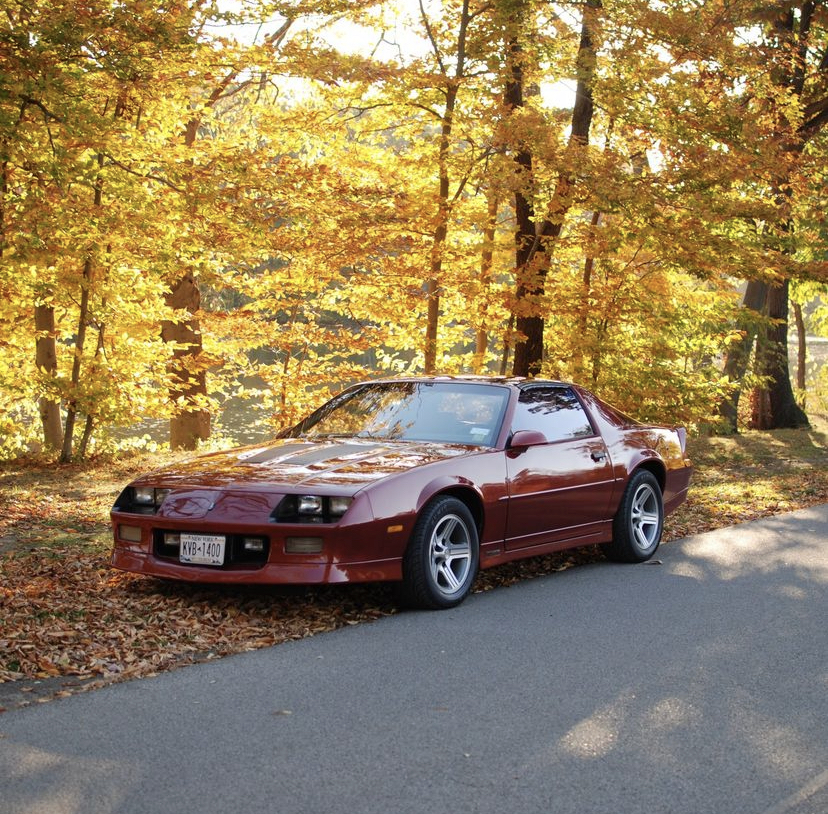
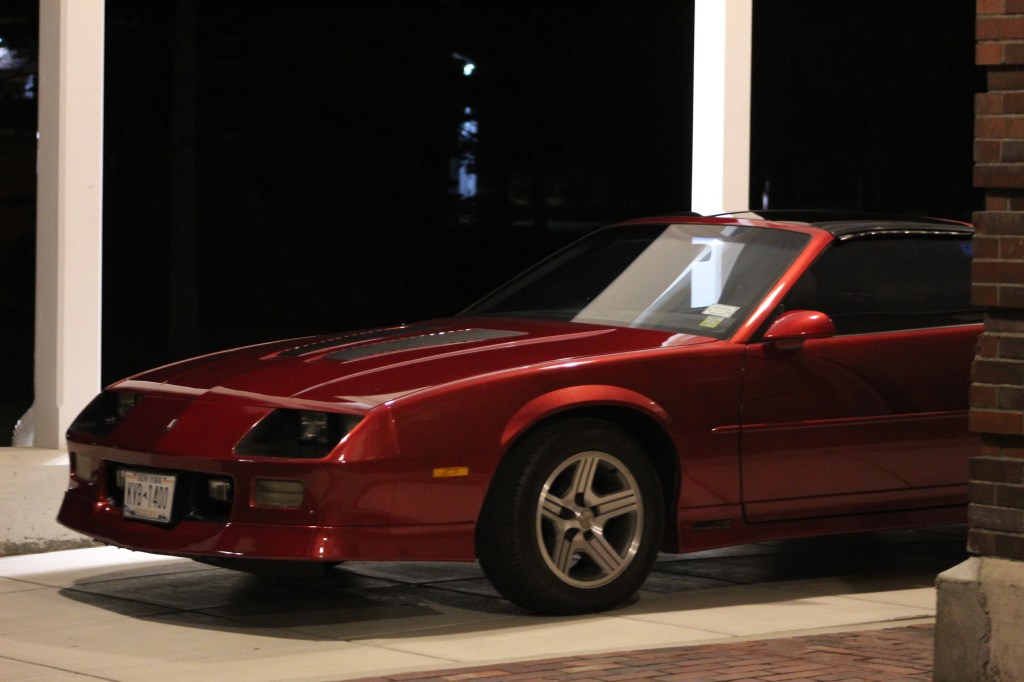
Check out this article Hagerty wrote about my car!
References
Itemized Order List and Gearing Comparison
https://docs.google.com/spreadsheets/d/1QEY7ga8oPoHTmkdStcL5SIZHnh79d4Hvdu2y4gZ0lcA/edit?usp=sharing
https://docs.google.com/spreadsheets/d/1_ny_xrkivb5rVpzi3RWThcrFYMs3aF1nw8C5p44mRQs/edit?usp=sharing
Other AR5 and Swap Resources
https://www.thirdgen.org/forums/transmissions-drivetrain/779516-colorado-canyon-ar5-5-a.html
https://www.transmissiondigest.com/getting-a-grip-on-the-aisin-ar5-transmission
https://sites.google.com/view/vortec4200wiki/manual-trans-overview/gm-ma5-aisin-ar5
https://www.my.is/threads/comprehensive-ar5-swap-thread.566154
Purchased Parts
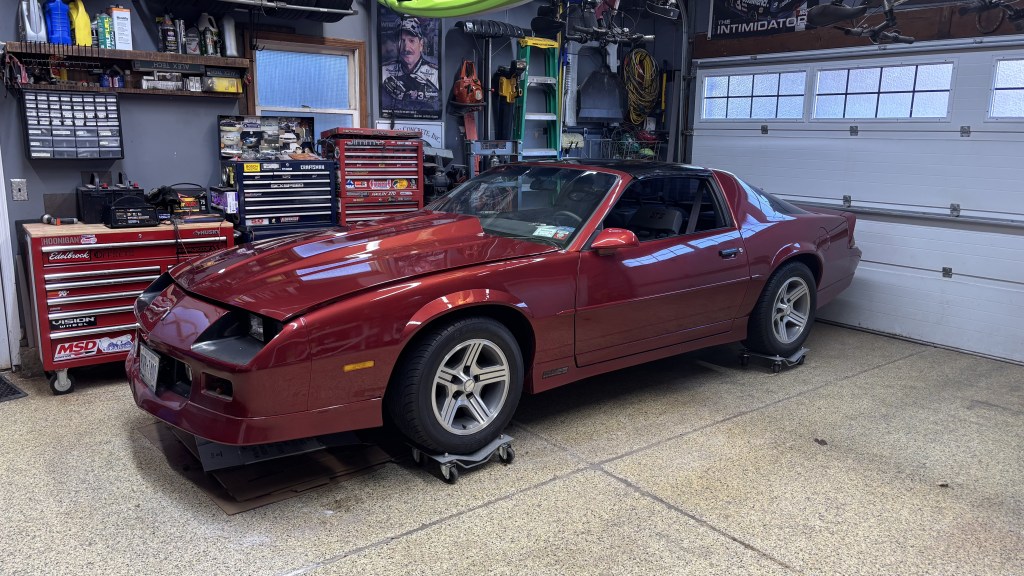
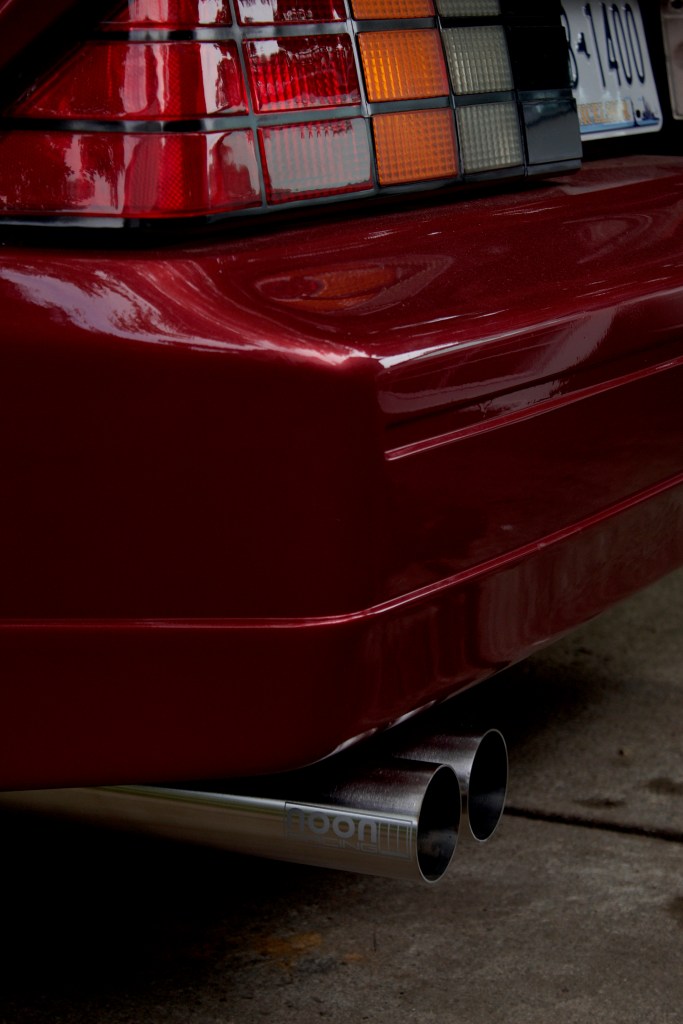
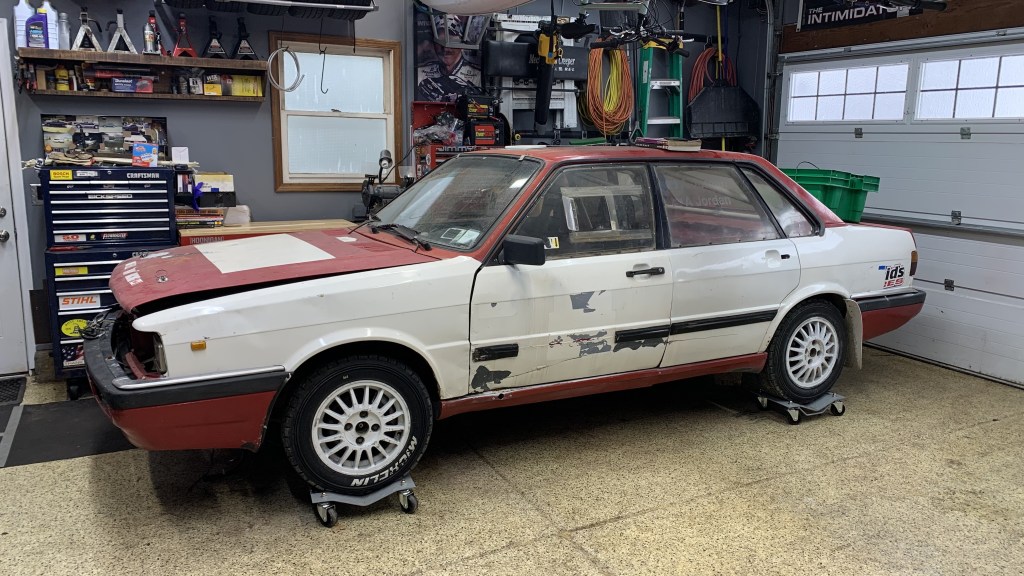
Some Beauty Shots


Leave a comment